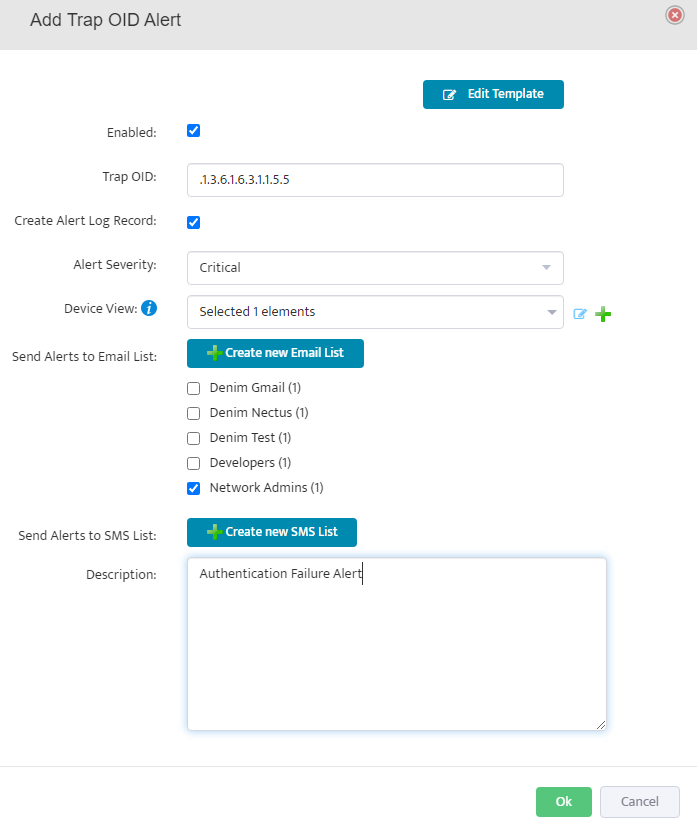
Nectus and Azure SAML Integration
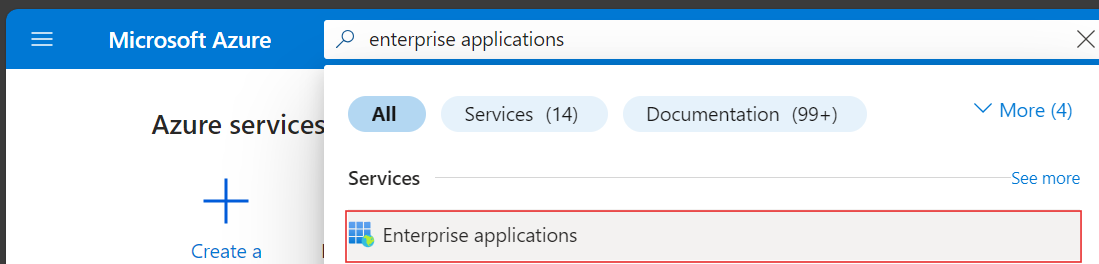
Step 1: Navigate to Identity -> Enterprise Applications from within the Azure Portal:
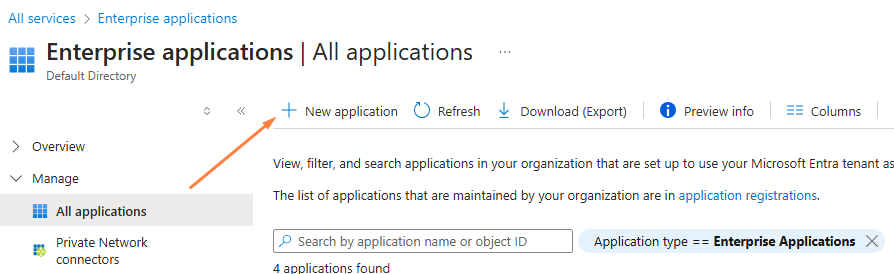
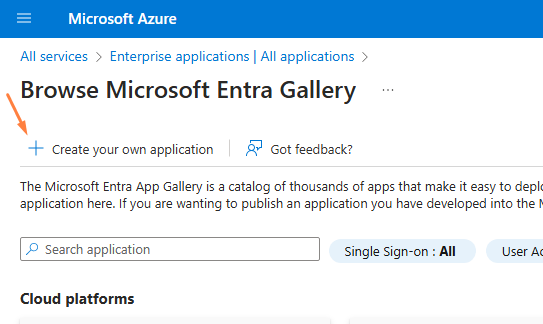
Step 2: To add a new application, click the new application button:
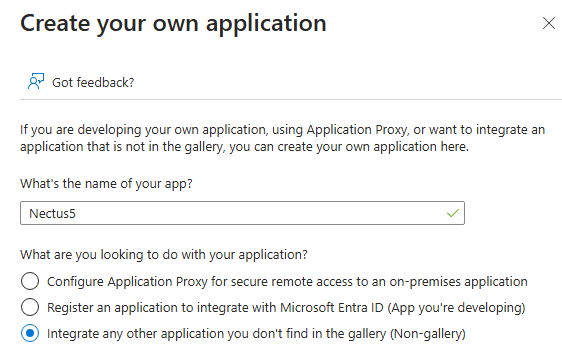
Step 3: Create your own application:
Step 4: In the application panel, select Non-Gallery application and enter a name (for example, Nectus5) and Select Create
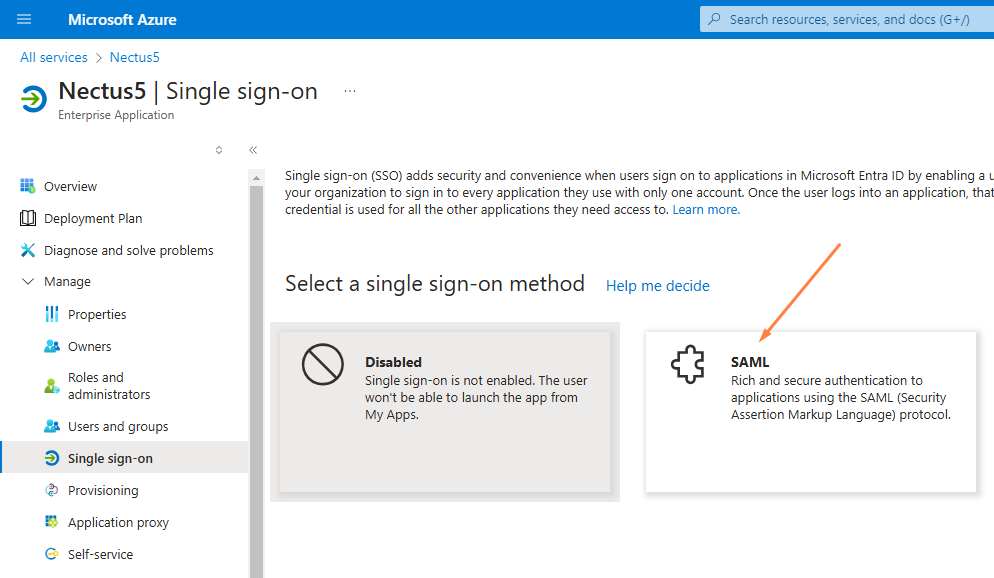
Step 5: Navigate to Manage-> Single Sign On found on the left-hand panel and select SAML for the SSO method:
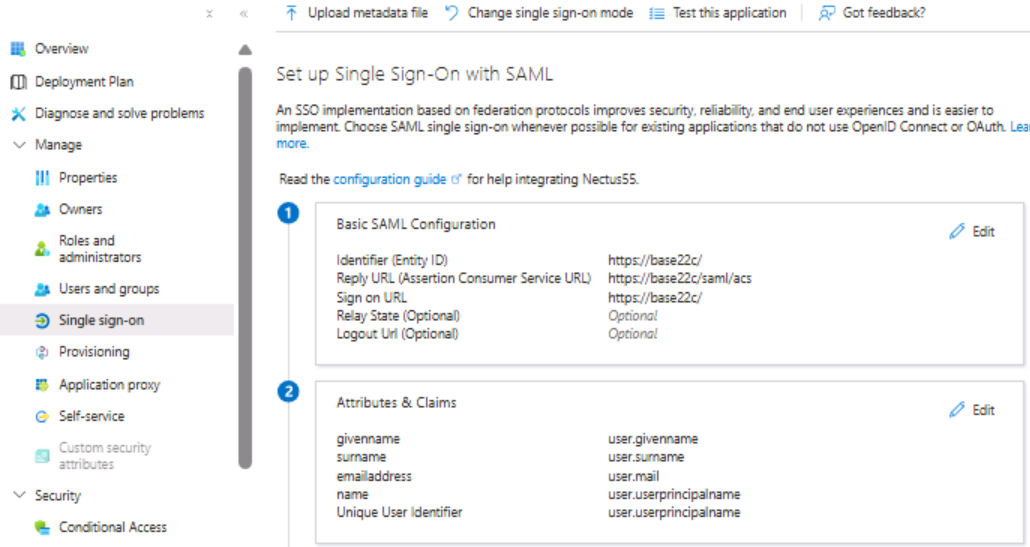
Step 6: On the Set up Single Sign-On with SAML page, click the Edit icon to open the
Basic SAML configuration dialog:
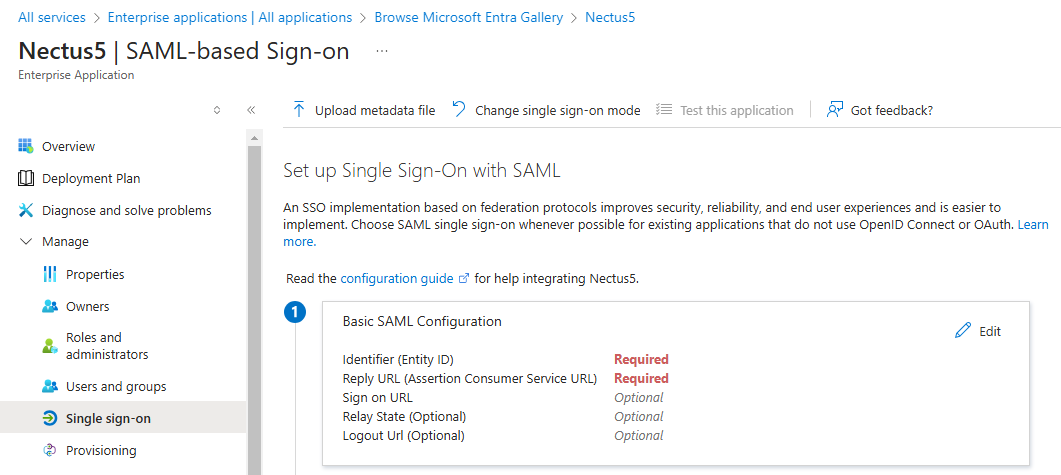
Step 7: On the Basic SAML Configuration section, perform the following steps (please note these are the default values out of the box and will be different for every organization):
- In the Identifier textbox, type the value:
https://base22c/saml
- In the Reply URL textbox, type the value:
https://base22c/saml/acs
- In the Sign-on URL textbox, type the value:
https://base22c/saml
Step 8: In the User “Attributes and Claims’ section, check that Azure is passing at least the following claims: givenname, surname, emailaddress, name, and unique User Identifier (this is the default setting)
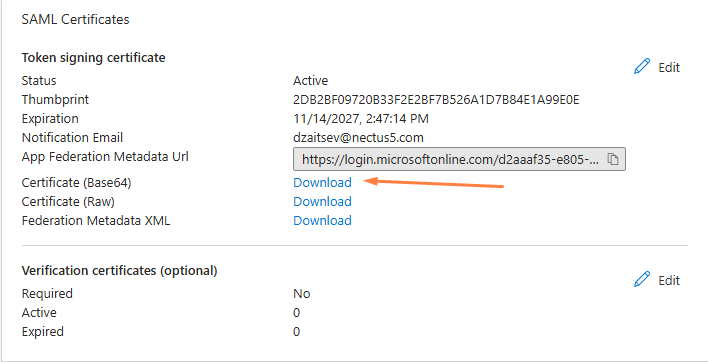
Step 9: On the “SAML Certificates” section, download the Base64 certificate and save it to your computer.
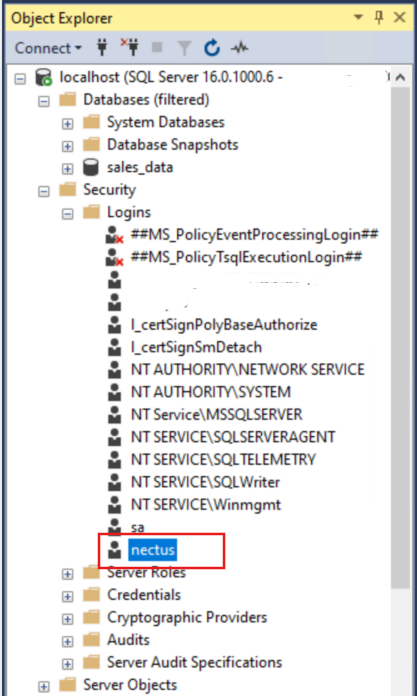
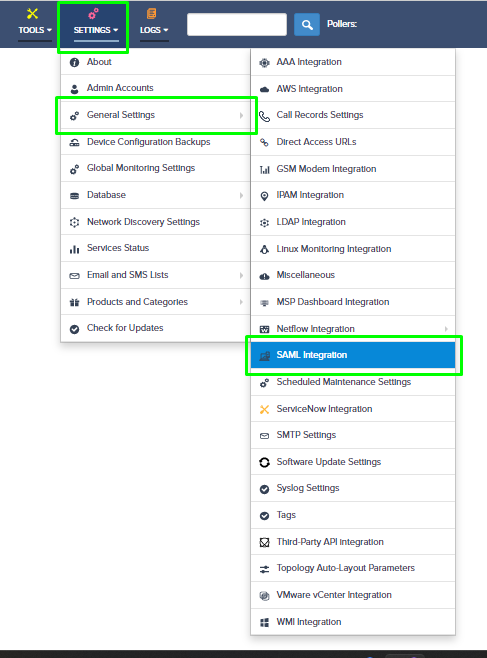
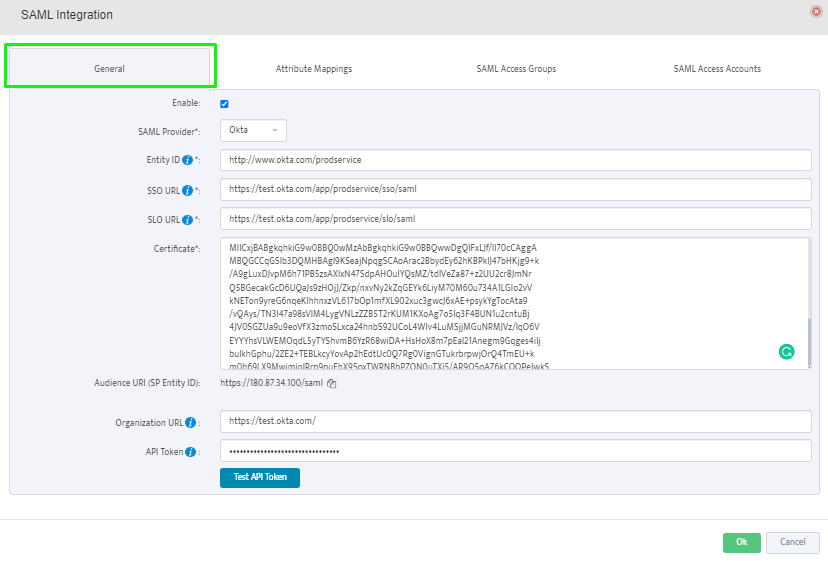
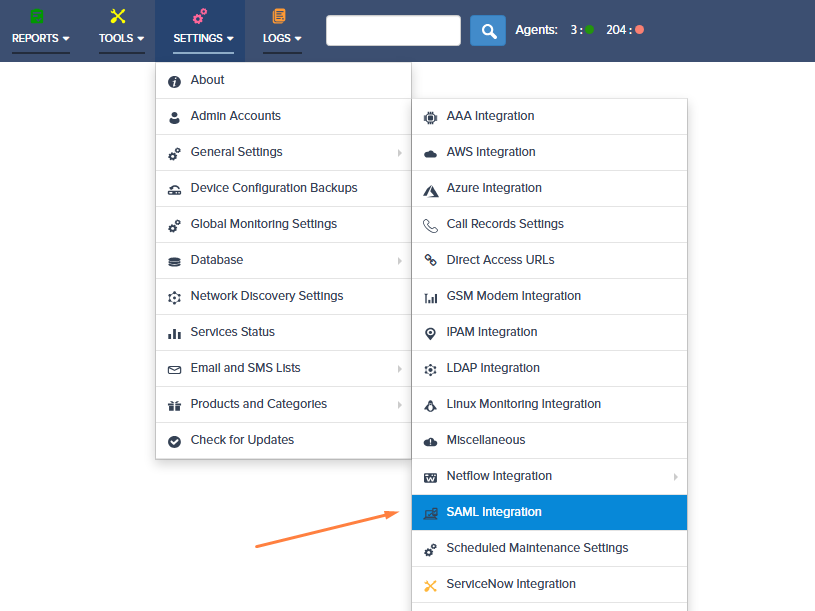
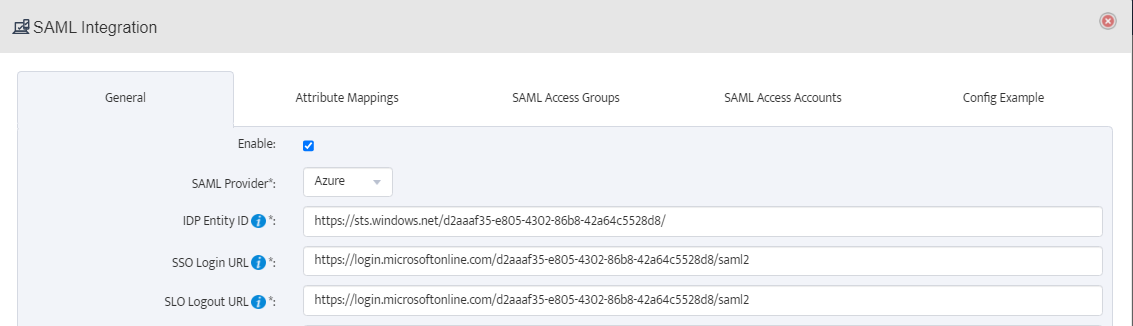
Step 10: Navigate to Nectus, and open the SAML configuration settings:
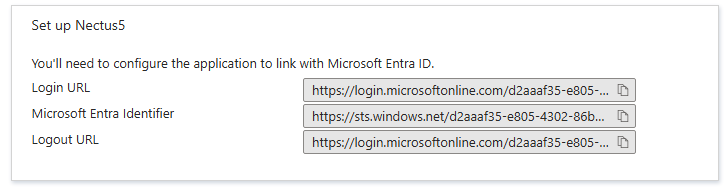
Step 11: Take the values listed for the Login URL, Azure AD Identifier, and Logout URL, and paste these to the corresponding sections in the SAML configuration settings in Nectus.
Ensure the SAML Provider selected is Azure:
In Nectus5:
The certificate value is the plaintext value of the Base64 certificate downloaded previously (rename the file with a .txt extension and copy the string from Notepad):

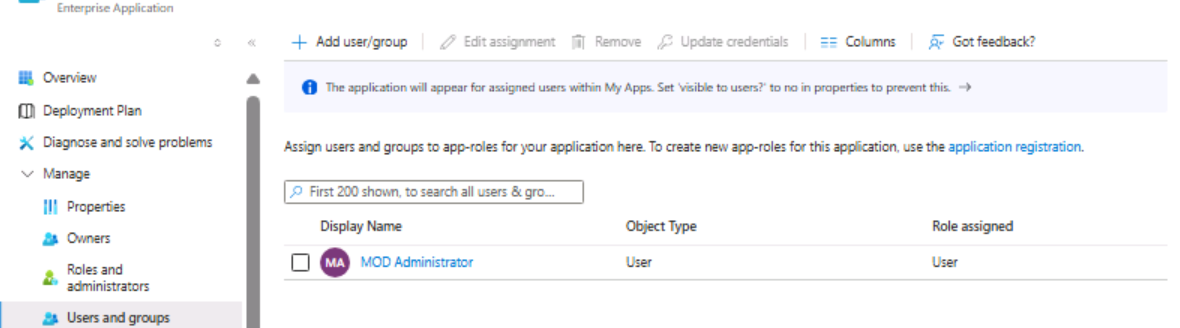
Step 12: Assign Users and Groups to the enterprise application in the Azure portal:
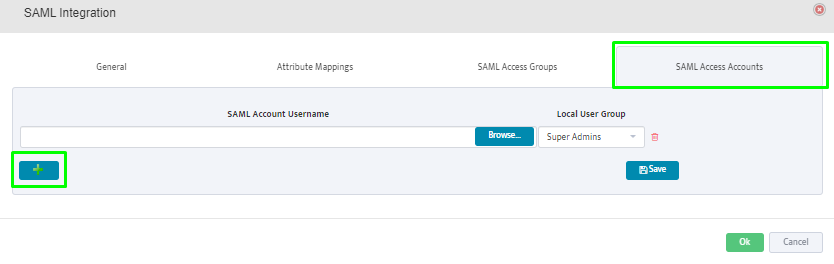
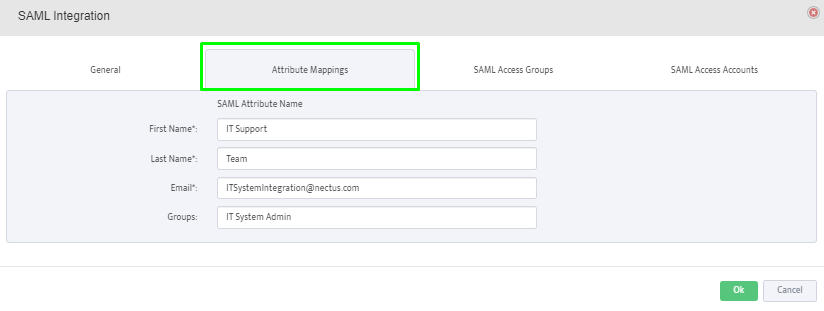
Step 13: Finish the remaining configuration on the Nectus5 application for Attribute Mapping, SAML access groups, and SAML access accounts:
Attribute Mappings: provide the SAML attributes for First Name, Last Name, Email and membership Groups. This mapping is between SAML attributes and Nectus fields.
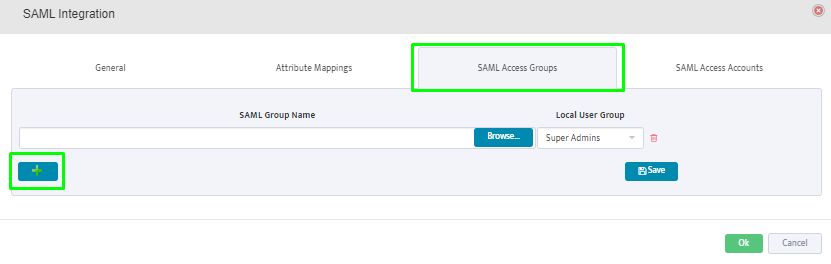
SAML Access Groups: Click on the “+” button to add the SAML user groups from the SAML Server.
Members of the selected groups will be allowed to login to Nectus.
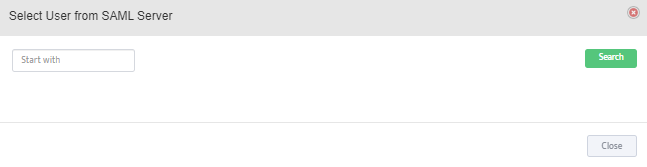
SAML Access Accounts: Click on the “+” button to add individual user accounts from the SAML Server.
Selected users will be allowed to login to Nectus.