How to Monitor Windows Services with Nectus
Quick Start Guide
Step 1: Login to the Nectus portal, Add the WMI Account for accessing the Windows Servers.
Go to Settings -> General Settings -> WMI Integration.
Click on the Add button in the WMI Integration Modal.

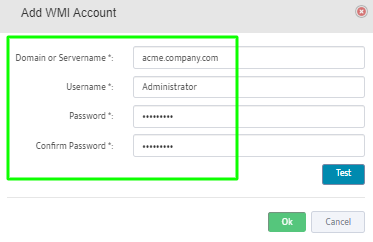
Step 2: Provide Windows Domain/Server information with user credentials and click on the Test button.
Step 3: Now, let’s create a WMI group and add the Windows Server into that group.
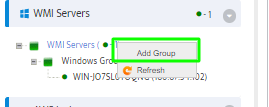
Go to WMI Servers and right click to Add a Group.
Step 4: Give a valid name for the WMI Group and enable the monitoring.
Assign a Monitoring Profile to the group.

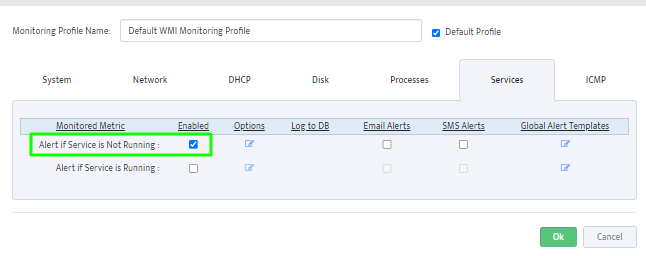
Step 5: Click Edit profile and go to the “Services” Tab and check the necessary alerting checking boxes.
Step 7: Add the Service information by clicking the Options button.
Here, we added the “Print Spooler” Service to monitor and enable the checkbox to start the Service, if it had stopped.
Add the Service name in the text box by pressing “+” button.

Save settings to monitoring profile.
Step 8: Now, we had successfully applied the Monitoring Profile. Click on “Ok” button.

Step 9: Now, add the Windows Server to the group we created.
Right click on the created group and select the Add New WMI Server option.
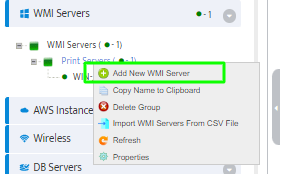
Step 10: Provide the IP address, select the appropriate WMI Monitoring Profile Group and WMI Account for access.
Click on the “Test” button to test the server access.


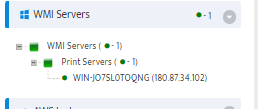
Step 6b: Now we’ll see the newly added server in the below screenshot.
